Wednesday, January 24, 2018

Long Range Radios Linux/macOS Part 2 - Adafruit Feather m0 RFM96 Lora Radio

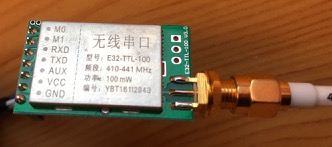
After previously playing around with the e32-ttl-100 modules, this time the focus is on microcontroller boards that include a lora transceiver. These devices are very small, the library for radio access seems to be quite stable and it already has support for packet transmission! So not only is SLIP encoding obsolete here but the maximum packet size is also significantly larger at over 250 bytes! The downside? You have to write your code in C/C++ for a microcontroller! This is something completely different than developing for Linux systems such as a Raspberry Pi or even an OpenWRT-based router!


Adafruit Feather m0 lora with ghetto-style wire antenna

The solution? Use the integrated serial port on the microcontroller to simulate a modem. Therefore, only the low level stuff has to be developed for the microcontroller and higher level communication stuff can be handled on other devices! In my case, I prototyped all this on an Adafruit Feather m0 lora module as shown in the picture above.

The rf95modem firmware is available open source and can be easily build using PlatformIO. Currently, only some of the RFM95 parameters can be manipulated through the serial interface and one can only send and receive data frames via the serial port. The "modem" is controlled through AT commands similar to classic dial-up modems.

Here is a list of currently implemented commands:

AT+HELP Print this usage information. AT+TX=<hexdata> Send binary data. AT+RX=<0|1> Turn receiving on (1) or off (2). AT+INFO Output status information. AT+MODE=<NUM> Set modem config: 0 - medium range (default) Bw = 125 kHz, Cr = 4/5, Sf = 128chips/symbol, CRC on. 1 - fast+short range Bw = 500 kHz, Cr = 4/5, Sf = 128chips/symbol, CRC on. 2 - slow+long range Bw = 31.25 kHz, Cr = 4/8, Sf = 512chips/symbol, CRC on. 3 - slow+long range Bw = 125 kHz, Cr = 4/8, Sf = 4096chips/symbol, CRC on.

This makes sending raw data really easy:
AT+TX=414141
Beware, overlong packets might be a problem since the radio drivers might not always give correct numbers for maximum message length!

Receiving this data on another module is just as easy. First, the receive listener must be activated:
AT+RX=1
And the for each incoming transmission a line similar to the following is printed to the serial line:
+RX 3,414141,-15,8
This means that 3 bytes, encoded as a HEX string, were received. RSSI for this packet was -15 and SNR was 8.

Furthermore, one can display various status information about the current configuration using the AT+INFO command:
status info: firmware: 0.1 modem config: medium range max pkt size: 251 frequency: 433.00 rx listener: 1 rx bad: 0 rx good: 0 tx good: 3

This makes it really easy to tap into machine-to-machine networks using rf95-family based lora chips from any mac or linux computer. Due to the fact that I only have simple wire antennas attached, I have not made any real range tests yet. Once my uFL connectors and antennas from aliexpress  get here, I will  do some more serious experiments.

Long Range Radios Linux/macOS Part 1 - E32-TTL-100

One of the cheapest ways to get long range communication on any computer is equipping it with a E32-TTL-100 (or E45-TTL-100) lora module. These modules transparently provide a communication channel via a serial interface. The specs can be found all over the internet such as here and here. Unfortunately, there is no application for linux or macOS to set the module parameters such as frequency and air speed.


These modules can be directly hooked up to any serial connector for sending and receiving text messages. Problematic is just switching between the configuration mode and sending mode, therefore the m0 and m1 pins have to be both LOW or both HIGH requiring some extra wiring, jumpers or extra GPIO pins. For ease of use, there are special adapters available like the e15-usb-t2. Another solution that I prefer is hooking the m0 and m1 pins to some raspberry pi GPIO pins. I connected them to pins GPIO17 and GPIO27. This has the benefit that switching between config and transmission mode can be done in software without the use of jumpers!

Configuration


The next problem was that setting parameters requires setting individual bits in hex string encoded bytes. For windows an official software is available with an easy to use GUI - so far I have never used this piece of software :) We first used python to ease the process of generating a valid config a bit. The project is very incomplete and not that useful at the moment. A few months later, I found some time during the cold winter months to play some more with these modules. This time I wanted to produce something more stable and useful. This is where go-e32-lora comes in to play. It is a library as well as a set of command line tools written in golang and optimized for the e32 chips. First of all it provides e32config a simple tool to read-out a config, decode hex config strings, generate a new one, switch operating modes (if GPIOs connected) and apply configs. There is even a dialog-based wizard for config generation included:


After developing the textmode e32config I found a graphical e45config tool which could probably be easily tweaked to work with an e32 chip. The major difference being only the chosen radio frequency.

Applications

One of the biggest problems you will encounter when dealing with e32 chips is the maximum packet size of 58 bytes! Since the plan was to run something like serval-dna via these lora links this is unacceptable. The solution is fragmentation! But since the chip hides all packet information from us and instead transparently delivers raw character streams one does not know when a specific transmission is beginning, finished, interrupted or mixed with another transmission from another node! Therefore, the  go-e32-lora lib uses SLIP encoding together with a fragmentation mechanism to provide the required features. This works surprisingly well, even though lost fragments are not retransmitted at the moment. Since bandwidth is very precious and golang is so easy I also added an option to compress all the payload. Depending on what you send this can dramatically reduce the number of bytes or in some cases even increase them!
To specify where the e32 module is connected, the library checks for a LORAPORT environment variable. By default it tries to open /dev/ttyS0 but you can easily point it to /dev/ttyUSB0 or similar.

Commands

Several useful commands are provided by the go-e32-lora project:
- pktsend - a simple tool to send any provided string via lora-SLIP-frag packet. Due to the rx/tx buffer limit of 256 bytes on the E32 chips the total number of bytes should not exceed that limit.
- pktrecv - the counterpart to pktsend, receives lora-SLIP-frag packets and prints them to the console.
- pktdump - for debugging purposes just dumps anything received via lora interface has hex bytes.

Evaluation

For evaluation purposes I wanted to do some range checks. The bcaster command  periodically broadcasts the hostname, a sequence number and the current time via lora. On the other side there is monitor which just listens for any incoming transmissions and outputs them to the command line. In previous tests I ran around carrying a laptop in one hand, an antenna in the other and various pieces of electronics in between. This time I wanted something smaller and even more portable. I still had an 16x2 I2C lcd display from a raspberry pi jukebox project laying around. Together with an unused RPi PowerPack and a Pi Zero W this makes a super portable prototype device!

Pi Zero W, E32-TTL-100, 16x2 LCD, RPi PowerPack

After looking around in the house I even found a case for the device that was easy to customize and unlike a 3d printed one did not rely on fossil fuels or had me waiting for hours just to realize that it does not fit :) So this is how the Lora RangeFinder 2000 was born!

3d printed case? no thanks! 
I set up two main bcaster nodes, one at my office and the other one at home. Since the office building is built of thick concrete walls and my office window is facing away from the city, the main range test results come from my home node. The building is surrounded by several others in the middle of the city, in direction of my working place there is also a large forrest area in between. The next morning I placed the Lora RangeFinder 2000 on the passenger seat of my car while driving to work to record received beacons.

Display last received lora beacon.
So how far could I go? With 1K airspeed and forward-error-correction off the last packets I received were in a distance of 1.8 - 2 km from my home. With 25K airspeed and FEC on I still got some packets in a distance of 1.7 km but with much higher packet loss. But keep in mind that this was all logged in a vehicle constantly driving about 70 km/h! Considering that the transmitter was placed in the middle of a room, next to my computer, far away from any window and then several houses and parts of a forrest in between (no line of sight!) the results are still quite good!

After the initial success I started porting mesher to this lora lib. This was straight forward and easy but the code still needs some clean-up, especially, after I added some DTN-like features to it.

These developments have been delayed by the fact that I got my hands on a different lora module: RFM95. More specific the adafruit feather boards with lora chips (m0 and 32u4). These will be featured in part 2 of this series.


Friday, May 19, 2017

Usage examples for serval-dna and servalshellscripts

Usage examples for serval-dna and servalshellscripts

To make life with serval easier I compiled a bunch of scripts that can be used on any Linux-like system with bash, curl and jq installed. Some inspiration was taken from other projects like ibrdtn with its dtntrigger application.

Detailed installation instructions for serval-dna and servalshellscripts can be found on their respective github pages.

This article is organized as follows:

  1. Example network setup
  2. Starting serval for the first time
  3. File related tasks (add and update of files)
  4. Append-only journals
  5. Text messaging and chatbot
  6. Automatic new content triggers
  7. Final words


1. Example network setup


For this article three hosts are used with the following layout:
n1 <-> n2 <-> n3

Hostname IP SID
n1 10.0.0.20 CBDECA838535B64EF2868148E43020C124E01C2CC1E1CA356B171BCE68F79252
n2 10.0.0.21 1CF665DAC21437B1841A1BC9BE34A11A075F985CFCBB3A0C28E8F0FEC9B25D3B
n3 10.0.0.22 00224C08CC240C36571791E8CBCB7EFEB29C551B585EA85815A369767AB55978


2. Starting serval for the first time


Repeat this on each node:

n1 ~ # mkdir servaldir
n1 ~ # cd servaldir
n1 ~/servaldir # start_serval -i
Starting daemon
INFO: Local date/time: 2017-05-19 13:04:03 +0200
INFO: Serval DNA version: START-3734-g9b7d8bf
WARN: conf.c:65:reload()  config file /tmp/pycore.54650/n1.conf/serval.conf does not exist -- using all defaults
WARN: No network interfaces configured (empty 'interfaces' config option)
Setting interfaces to '*'
INFO: Local date/time: 2017-05-19 13:04:04 +0200
INFO: Serval DNA version: START-3734-g9b7d8bf
WARN: conf.c:65:reload()  config file /tmp/pycore.54650/n1.conf/serval.conf does not exist -- using all defaults
Setting RESTAUTH to pum:pum123
Creating new identity
sid:CBDECA838535B64EF2868148E43020C124E01C2CC1E1CA356B171BCE68F79252
identity:8C7D1B972890EC7D8021926A508B363CE57D7658840C2B32C2995F847B99AF21
Restarting daemon
Going interactive

n1 ~/servaldir #  
After this command you get an interactive shell with SERVALINSTANCE_PATH set to your current directory.
Omitting the optional parameter to start_serval you get back to your regular shell without the added environment variable.
The command starts serval, generates a new identity if none is present, adds a REST user and adds ALL network interfaces to servald.
Edit start_serval script for different REST credentials or only specific interfaces (e.g. wlan*).


3. File related tasks


Sharing a file with the rhizome helper script is easy:
n2 ~/servaldir # echo "hallo world example" > /tmp/myfile
n2 ~/servaldir # rhizome put /tmp/myfile
n2 ~/servaldir #
Receiving on n1:
n1 ~/servaldir # rhizome list
 + 54D5A0C1FF192DDA671CC76DDF058D1835D55E35F17CDB87091A2A0771392BD2
 + 20 Bytes | 13:05:30 05/19/2017 | 13:05:30 05/19/2017
 + A: null* S: 1CF665DA* R: null*
n1 ~/servaldir # rhizome get 54D5A0C1FF192DDA671CC76DDF058D1835D55E35F17CDB87091A2A0771392BD2
hallo world example
n1 ~/servaldir # 
Updating myfile in place on n2 again (BID of file required):
n2 ~/servaldir # echo "goodbye world example" > /tmp/myfile
n2 ~/servaldir # rhizome update /tmp/myfile 54D5A0C1FF192DDA671CC76DDF058D1835D55E35F17CDB87091A2A0771392BD2
n2 ~/servaldir #
Changing again to n1:
n1 ~/servaldir # rhizome list
 + 54D5A0C1FF192DDA671CC76DDF058D1835D55E35F17CDB87091A2A0771392BD2
 + 22 Bytes | 13:05:30 05/19/2017 | 13:09:37 05/19/2017
 + A: null* S: 1CF665DA* R: null*
n1 ~/servaldir # rhizome get 54D5A0C1FF192DDA671CC76DDF058D1835D55E35F17CDB87091A2A0771392BD2
goodbye world example
n1 ~/servaldir # 
The bundle id has stayed the same but the number of bytes and the timestamp have changed.


4. Append-only journals


Having append only files shared is sometimes useful if you want to distribute for example sensor data such as a position log.
n2 ~/servaldir # journal append SENSORLOG coords "$(date +"%s") x: 23 y: 26"
n2 ~/servaldir #

n1 ~/servaldir # journal list SENSORLOG coords
service, bundle_id, author, size, name
SENSORLOG,4D46A163FBB3763607FAE345B1E4A475B72B7CE486D4F716CB80DB31DD65906B,null,23,coords
n1 ~/servaldir # journal show 4D46A163FBB3763607FAE345B1E4A475B72B7CE486D4F716CB80DB31DD65906B
1495192585 x: 23 y: 26
n1 ~/servaldir #
So far one entry, so lets add another position to our log on n2:
n2 ~/servaldir # journal append SENSORLOG coords "$(date +"%s") x: 24 y: 27"
n2 ~/servaldir #
Reading out the journal back on n1:
n1 ~/servaldir # journal show 4D46A163FBB3763607FAE345B1E4A475B72B7CE486D4F716CB80DB31DD65906B
1495192585 x: 23 y: 26
1495192825 x: 24 y: 27
n1 ~/servaldir #


5. Text messaging and chatbot


The chat bot can be used as a simple remote command trigger.
n3 ~/servaldir # cp ~/src/servalshellscripts/bot/chat-ng .n3 ~/servaldir # vim chat-ng
Change the script in the CONFIG and HOOKS sections. In this case ADMIN_SID is set to the SID of n1.
The command to execute as normal user is meshms send $1 "PUBLIC" >/dev/null and as admin meshms send $1 "ADMIN: $(df -h / | tail -n1)" >/dev/null.
This means that the admin gets the current free disk space as a reply and anyone else only the string “PUBLIC”.
n3 ~/servaldir # ./chatbot-ng
Now lets send a message to n3 from n2:
n2 ~/servaldir # meshms send 00224C08CC240C36571791E8CBCB7EFEB29C551B585EA85815A369767AB55978 "hello"
{
 "http_status_code": 201,
 "http_status_message": "Message sent",
 "meshms_status_code": 1,
 "meshms_status_message": "Updated"
}
n2 ~/servaldir # meshms list
# header: ["_id","their_sid","read","last_message","read_offset"]
[0,"00224C08CC240C36571791E8CBCB7EFEB29C551B585EA85815A369767AB55978",false,18,0]
n2 ~/servaldir # meshms msgs 00224C08CC240C36571791E8CBCB7EFEB29C551B585EA85815A369767AB55978
{
"read_offset":0,
"latest_ack_offset":8,
"header":["type","my_offset","their_offset","token","text","delivered","read","timestamp","ack_offset"],
"rows":[
["<",17,18,"AhII","PUBLIC",true,false,1495193503,null],
["ACK",8,3,"AQgI",null,true,false,null,8],
[">",8,0,"AQgA","hello",true,false,1495193462,null]
]
}
n2 ~/servaldir # meshms read 00224C08CC240C36571791E8CBCB7EFEB29C551B585EA85815A369767AB55978
{
 "http_status_code": 201,
 "http_status_message": "Read offset updated",
 "meshms_status_code": 1,
 "meshms_status_message": "Updated"
}
n2 ~/servaldir # 
After sending the message we checked for new conversations, listed the messages in the conversation with n3 and afterwards marked all messages as read.
Now the same from n1:
n1 ~/servaldir # meshms send 00224C08CC240C36571791E8CBCB7EFEB29C551B585EA85815A369767AB55978 "hello"
{
 "http_status_code": 201,
 "http_status_message": "Message sent",
 "meshms_status_code": 1,
 "meshms_status_message": "Updated"
}
n1 ~/servaldir # meshms msgs 00224C08CC240C36571791E8CBCB7EFEB29C551B585EA85815A369767AB55978
{
"read_offset":58,
"latest_ack_offset":8,
"header":["type","my_offset","their_offset","token","text","delivered","read","timestamp","ack_offset"],
"rows":[
["<",17,58,"AjoI","ADMIN: /dev/sda1        26G   22G  2.3G  91% /",true,true,1495193708,null],
["ACK",8,3,"AQgI",null,true,false,null,8],
[">",8,0,"AQgA","hello",true,false,1495193695,null]
]
}
n1 ~/servaldir # meshms read 00224C08CC240C36571791E8CBCB7EFEB29C551B585EA85815A36967AB55978
{
 "http_status_code": 201,
 "http_status_message": "Read offset updated",
 "meshms_status_code": 1,
 "meshms_status_message": "Updated"
}
Here the reply message is different and contains the output of the disk free command.
Meanwhile the output of chatbot-ng on n3 should look like this:
n1 ~/servaldir # ./chatbot-ng 
Fri May 19 13:31:03 CEST 2017 | 1CF665* : hello
Fri May 19 13:34:56 CEST 2017 | ADMIN(CBDECA*) : hello


6. Automatic new content triggers


In the following example we want to process any new SENSOR journals that n1 receives as soon as possible.
First we need a script to handle new content, therefore we create a file named /tmp/sensorevent with the following content:
#!/bin/sh
SERVICE=$1
NAME=$2
BID=$3

journal show $BID | wc -l > /tmp/$SERVICE-$NAME.numcoords
Now make it executable and start rtrigger on n1:
n1 ~/servaldir # chmod a+x /tmp/sensorevent
n1 ~/servaldir # rtrigger /tmp/sensorevent SENSORLOG coord*
CMD: /tmp/sensorevent
SERVICE FILTER: SENSORLOG
FILE FILTER: coord*
This filters only for files of SERVICE ‘SENSORLOG’ and with a filename matchig the regex ‘coord*’.
Now lets append something to our log again on n2:
n2 ~/servaldir # journal append SENSORLOG coords "$(date +"%s") x: 25 y: 27"
n2 ~/servaldir # journal append SENSORLOG coords "$(date +"%s") x: 25 y: 26"
Switching back to the console of n1:
[...]
CMD: /tmp/sensorevent
SERVICE FILTER: SENSORLOG
FILE FILTER: coord*
TRIGGER (Fri May 19 13:50:09 CEST 2017): SENSORLOG coords 4D46A163FBB3763607FAE345B1E4A475B72B7CE486D4F716CB80DB31DD65906B
Executing /tmp/sensorevent
TRIGGER (Fri May 19 13:50:26 CEST 2017): SENSORLOG coords 4D46A163FBB3763607FAE345B1E4A475B72B7CE486D4F716CB80DB31DD65906B
Executing /tmp/sensorevent
Checking the output files on n1:
n1 ~/servaldir # ls -1 /tmp/SENSORLOG*
/tmp/SENSORLOG-coords.numcoords
n1 ~/servaldir # cat /tmp/SENSORLOG-coords.numcoords
4
n1 ~/servaldir # 


7. Final words


This quite lengthy article hopefully gave some insight how serval can easily be used in sensor networks and for various automation tasks. By writing some simple shell glue code existing  applications can benefit from delay-tolerant networking features.

The wrappers provided in servalshellscripts are nowhere near complete and probably contain quite a few bugs but still make rapid prototyping of DTN apps in our lab much easier.

Tuesday, March 1, 2016

Mapping The New (Serval) World

Humans tend to understand stuff better that they can see, stuff that they can visualize. Having a good map when entering new terrain was and is always important. This is not only true for the real world but also for the digital world. Even without knowledge of the real position of nodes one can still visualize how every thing is connected either through traceroute information or what is present in our routing table.

For this project lets assume the following network setup with 9 nodes involved:

Network Topology

My first approach was to simply parse the output of servals route print command, use pythons networkx library and plot it all with matplotlib:

Visualization using matplotlib


Worked quite nice, was very easy to implement but is really kind of limited when interacting with the graph and also has quite some dependencies. Nevertheless the script can be found here.

While playing around with networkx I found out that it can also output any graph as JSON. This can then be easily parsed by JavaScript libraries such as D3js in your browser. After writing a short prototype in python and testing it I added a route json command to serval to directly output JSON data, eliminating the need for python.


To visualize everything I just merged the official force-directed sample with another sample from the internet plus some minor modifications to prettify stuff and was done with it.

Putting all these pieces together - assuming servald has route json support and is already running plus route-network.html is in the current directory:
$ servald route json > route.json
$ python -mSimpleHTTPServer
Now use a webbrowser and go to http://localhost:8000/route-network.html and you're done!

Visualization using D3

Of course it would be cool to have this route data available as a restful call provided by serval. Then we could easily integrate it into any (Web-)GUI and maybe someone will develop a more sophisticated visualization where one can copy'n'paste SIDs or send MeshMS to specific nodes! Wouldn't that be great?! :)

The scripts, patches, installation instructions and sample data can be found in the serval-vis repository.


Tuesday, February 16, 2016

One Proxy To Rule Them All

Not all client/server applications make sense in a peer-to-peer environment or over a delay-tolerant network. Sometimes data is just too big or node specific to be shared over servals rhizome - think various local community websites - or doesn't make sense over DTN - like an SSH connection.

It would be way too time consuming porting these "legacy" applications to serval and giving them native MSP support. A quick and easy way to still use them is already there in servald. It supports the msp listen and msp connect commands that act similar to netcat.

Manual MSP


So lets get a local webserver into serval mesh:

root@n9:/tmp/pycore.35289/n9.conf# cat index.html
<html><body>test</body></html> 

root@n9:/tmp/pycore.35289/n9.conf# python -mSimpleHTTPServer
Serving HTTP on 0.0.0.0 port 8000 ...

Use a new terminal for testing and setting up the forwarding:

root@n9:/tmp/pycore.35289/n9.conf# curl http://127.0.0.1:8000
<html><body>test</body></html> 

root@n9:/tmp/pycore.35289/n9.conf# servald id self
1
sid
C39309B71A19274E4947A99EE721DA0638D3E8596C2EA2821D0F10DEA5F22729

root@n9:/tmp/pycore.35289/n9.conf# servald msp listen --forward=8000 80

That's it!

So now lets try to reach this site through msp from another node.

root@n4:/tmp/pycore.35289/n4.conf# servald msp connect C39309B71A19274E4947A99EE721DA0638D3E8596C2EA2821D0F10DEA5F22729 80
GET / HTTP/1.0

HTTP/1.0 200 OK
Server: SimpleHTTP/0.6 Python/2.7.6
Date: Tue, 16 Feb 2016 12:25:43 GMT
Content-type: text/html
Content-Length: 36
Last-Modified: Fri, 12 Feb 2016 12:48:04 GMT

<html><body>test</body></html> 

So it works! But you don't want to setup each and every connection manually - Software should automatically map SIDs to serval and take care of connection setup and routing. Usually these kind of problems are solved by using a proxy as it is done by the tor project for example.

Automatic Connection


The SOCKS5 protocol has a nice feature that makes our life much easier. It can not only operate on a given IP address to relay a connection but also be given a FQDN and resolve it itself!
So we need a proxy server that intercepts all domain names and check if it is a valid SID - 64 bytes all hex. Easy enough, next we need to invoke msp connect with the supplied SID and port, relay stdin and stdout from servald to the connected TCP session and we're done.

A quick proof-of-concept socks5-serval was put together with a modified version of python-socks5, the changes were minimal and the result works quite good, it can still be used for regular IP connections as well as with FQDNs.

Here it is in action:

root@n4:/tmp/pycore.35289/n4.conf# python python-socks5-serval/socks5.py


Open another terminal to test the proxy server.

root@n4:/tmp/pycore.35289/n4.conf# curl --socks5-hostname localhost:1080 http://C39309B71A19274E4947A99EE721DA0638D3E8596C2EA2821D0F10DEA5F22729
<html><body>test</body></html> 

It worked! In our other terminal window where the proxy is running some debug output should also appear:

root@n4:/tmp/pycore.35289/n4.conf# python python-socks5-serval/socks5.py
[INFO:] Got one client connection
[INFO:] Checking atyp: 3
[INFO:] Client wants to connect to C39309B71A19274E4947A99EE721DA0638D3E8596C2EA2821D0F10DEA5F22729:80
[INFO:] Starting transform thread
[INFO:] Starting serval mode C39309B71A19274E4947A99EE721DA0638D3E8596C2EA2821D0F10DEA5F22729
[INFO:] Starting Resending
[INFO:] Client quit normally


Instead of checking for an 64 byte hex string to identify SIDs one could also say that clients must use the TLD .serval to identify a serval address. Then a proxy would only have to check the TLD to be sure but on the other hand 64 byte hex is not a FQDN so we should be safe.

SOCKS5-serval was just a quick'n'dirty hack and is not really production ready but it demonstrates quite well how endless the possibilities for serval meshs are and how our beloved regular applications can continue to work in a full serval-routed network.

Tuesday, February 2, 2016

SIM Sala Bim - MilSim meets Network Emulation

We are currently developing our own network-simulation-emulation mix with complete flexible movement patterns for all nodes, qemu backends and various networks types. The whole system is called MiniWorld and has support for walking and visualizing everything on OSM maps. When talking about different scenarios and creating a scenario editor that got me thinking... A long time ago I used to play a military simulation game called Operation Flashpoint that came with a good scenario editor and good modding support. Just recently the successor, Armed Assault 3, got released for linux.. a perfect excuse to install the game on my workstation!

After fiddling around with it a bit I wrote a short script to periodically log all coordinates of "players". This script must be triggered automatically at the beginning of the mission to record all positions.

Settings for trigger

We then wrote a parser for the generated rpt file and fed these coordinates live into the MiniWorld backend, skipping our own movement code. Next step was to get a screenshot of the map, integrate it into Leaflet to visualize player movement outside of the game itself which was pretty straight forward except for some coordinate conversion problems :)

For demonstration purposes I used the MiniHattan map and created a short "emergency scenario". There are five different people involved, all having some device running an instance of serval. Each device has a fixed radius for wireless transfers, the question was is a drive-by enough time to transfer files? What size? Tests like these can easily be done here because AI, multiplayer, cars, drones and stuff like a physics engine are already built into the game, we could even have depleting batteries modelled in our backend and turn off some of the devices after some time.

Easy Scenario Editor


The whole system in action can be seen in the following video (no audio):


Monday, January 25, 2016

Hop Hop Hop Hop STOP!

While playing around with serval in various different network setups in core-network I found some odd behaviour. Getting to run serval to run in the simulator is describe in this article. In this blog post I am going to describe what I have observed.

The network setup


A simple chain of ServalNodes connected pair-wise, each machine with two interfaces - one neighbour on each interface.
N1 <-> N2 <-> N3 <-> ... <-> N17 <->N18
Chained serval setup in core-network.


The problem(?)


To see how the routing and mdp based services perform we did some testing. First connections were verified by using mdp ping.

root@n1:/tmp/pycore.46656/n1.conf# /home/meshadmin/serval-dna/servald mdp ping F40716A16538D25EA01134139056F02D23F9246583012048B4DBA4BBB46A594E
MDP PING F40716A16538D25EA01134139056F02D23F9246583012048B4DBA4BBB46A594E: 12 data bytes
F40716A16538D25EA01134139056F02D23F9246583012048B4DBA4BBB46A594E: seq=1 time=194ms hops=64 ENCRYPTED SIGNED
F40716A16538D25EA01134139056F02D23F9246583012048B4DBA4BBB46A594E: seq=2 time=198ms hops=64 ENCRYPTED SIGNED
F40716A16538D25EA01134139056F02D23F9246583012048B4DBA4BBB46A594E: seq=3 time=184ms hops=64 ENCRYPTED SIGNED
^C--- F40716A16538D25EA01134139056F02D23F9246583012048B4DBA4BBB46A594E ping statistics ---
3 packets transmitted, 3 packets received (plus 0 duplicates, 0 ignored), 0.0% packet loss
round-trip min/avg/max/stddev = 184/192.000/198/5.888 ms (3 samples)

So n18 is reachable from n1, slow ping but for 17 hops it is still okay.
If we try to do the same with an mdp trace, after all there might be different network paths, we end up with the following:
root@n1:/tmp/pycore.46656/n1.conf# /home/meshadmin/serval-dna/servald mdp trace F40716A16538D25EA01134139056F02D23F9246583012048B4DBA4BBB46A594E
Tracing the network path from 8410960D885656669C1B4C4AA56E4339B171E9285A254A1863A80FF7F483A141 to F40716A16538D25EA01134139056F02D23F9246583012048B4DBA4BBB46A594E
INFO: Local date/time: 2016-01-25 11:58:43 +0100
INFO: Serval DNA version: START-3478-g8e223b5
ERROR:network_cli.c:317:app_trace()  overlay_mdp_send returned -1, Timeout waiting for reply to MDP packet (packet was successfully sent).

Trying the same on n17 - only 16 hops away - we get the following:
root@n1:/tmp/pycore.46656/n1.conf# /home/meshadmin/serval-dna/servald mdp trace 614222015D22DBCD65FD79B8C311E12DDE6CDF086E71B0D9CD9746AFCBE02E71
Tracing the network path from 8410960D885656669C1B4C4AA56E4339B171E9285A254A1863A80FF7F483A141 to 614222015D22DBCD65FD79B8C311E12DDE6CDF086E71B0D9CD9746AFCBE02E71
0:8410960D885656669C1B4C4AA56E4339B171E9285A254A1863A80FF7F483A141
1:D6A5E4F4B6EAFE3A22B82742280322695601F2C5C9DF8A8AD6C5067F04E1E139
2:D158F542C7001C55350C67A6B975B08C2B8D2A63A60EC32FEC1712D2206F5C32
3:75A61C0DF5A46BEEEEB28F18C956ACA8C696DED4CBD4C4FE31A54AE2CB26D077
4:424B43C7E6CC80BEEE761F100217824CCEF201ECEA55D14B7F4B205FFA4FF630
5:2E0FCBB04D6C5DDE8D145206A786683164A4443E0AD214E79F69D79EFA1B1D0D
6:1B669680A1555490BC271881362C443E43131ADCB94BA285F6BA1B3B71DC9853
7:9CBAFAB66A0808573ED0FCA42376BC6B527AB39DEB89FFB344EE9381BD105936
8:B9B737D8CFFD5FBFDC5A20505159EC2798D60C4CC4F39B8B0AB6D4240B931C20
9:2AD0422C040079FF320C934D2E98DC9D154896CA1E492FBB3DF720FCFE7FD009
10:BA5288F511246B8C5D77B12B78C6D46DA92D1B28008F57CDAA9F278B9EF54C2B
11:C42A672FB4D19AA59DE47200CC581220CEC36CBE935F8FEF46027CA2604CA072
12:9A3B340EAF09679FF5FCAF720418DA7E2D959018A2C55227EB95C9928B53A52C
13:8EF8016470B665CED119B3CB2F76406952567E2DC16C74AC352B831F1614DB3C
14:57E8A11D20C8970733A5A0776FEA370C0440136D7D7873C1255A26A13924D155
15:79314E660CE67A6DD19E5CAB209CE619EA973A13387D8FE32A35685C1971796E
16:614222015D22DBCD65FD79B8C311E12DDE6CDF086E71B0D9CD9746AFCBE02E71
17:79314E660CE67A6DD19E5CAB209CE619EA973A13387D8FE32A35685C1971796E
18:57E8A11D20C8970733A5A0776FEA370C0440136D7D7873C1255A26A13924D155
19:8EF8016470B665CED119B3CB2F76406952567E2DC16C74AC352B831F1614DB3C
20:9A3B340EAF09679FF5FCAF720418DA7E2D959018A2C55227EB95C9928B53A52C
21:C42A672FB4D19AA59DE47200CC581220CEC36CBE935F8FEF46027CA2604CA072
22:BA5288F511246B8C5D77B12B78C6D46DA92D1B28008F57CDAA9F278B9EF54C2B
23:2AD0422C040079FF320C934D2E98DC9D154896CA1E492FBB3DF720FCFE7FD009
24:B9B737D8CFFD5FBFDC5A20505159EC2798D60C4CC4F39B8B0AB6D4240B931C20
25:9CBAFAB66A0808573ED0FCA42376BC6B527AB39DEB89FFB344EE9381BD105936
26:1B669680A1555490BC271881362C443E43131ADCB94BA285F6BA1B3B71DC9853
27:2E0FCBB04D6C5DDE8D145206A786683164A4443E0AD214E79F69D79EFA1B1D0D
28:424B43C7E6CC80BEEE761F100217824CCEF201ECEA55D14B7F4B205FFA4FF630
29:75A61C0DF5A46BEEEEB28F18C956ACA8C696DED4CBD4C4FE31A54AE2CB26D077
30:D158F542C7001C55350C67A6B975B08C2B8D2A63A60EC32FEC1712D2206F5C32
31:D6A5E4F4B6EAFE3A22B82742280322695601F2C5C9DF8A8AD6C5067F04E1E139
32:8410960D885656669C1B4C4AA56E4339B171E9285A254A1863A80FF7F483A141

Conclusion

16 hops are more than enough, nobody should ever need more... well, apparently ping can do more, didn't test other mdp based services. Delay tolerant services such as rhizome are obviously not effected and perfectly spread data around.

Rhizome spreading data.